Python flask에서, Resource 클래스를 이용한 API 서버 개발 방법
1. VS Code
VS Code에서 app.py 파일을 생성 후 기본 틀을 잡아준다.
from flask import Flask
from flask_restful import Api

from resources.recipe import RecipeListResource
from resources.recipe_info import RecipeResource


app = Flask(__name__)

api = Api(app)


if __name__ == '__main__' :
    app.run()
2. MySQL
schema와 table 생성 후 create user를 해준다.

use mysql;
# create user는 id이고, indentified py 는 비밀번호이다.
create user 'recipe_user'@'%' identified by 'recipe1234';

grant all on recipe_db.* to 'recipe_user'@'%' ;
3. VS Code
mysql_connection.py 파일을 만들고
mysql.connector를 import한 후
connection 함수를 만들어 준다.
import mysql.connector

#1 MySQL 홈에서 스패너 모양을 누른 뒤 내가 연결할 HOST를 누르면 hostname에 있는걸 복사해서 붙여넣는다.
def get_connection() :
    connection = mysql.connector.connect(
        host = 'graphene911-db.cett5e9xjv0f.ap-northeast-2.rds.amazonaws.com',
        database = 'recipe_db',
        user = 'recipe_user',
        password = 'recipe1234'
    )
    return connection

4. VS Code
상속시킬 resource class를 만들기위해
resource폴더와 데이터로 추가될 recipe.py파일을 만들고
원하는 작업을 적용할 코드를 작성해 준다.
( 쿼리문은 MySQL에서 작성 및 테스트 후 VS Code에 작성한다. )

from http import HTTPStatus
from flask import request
from flask_restful import Resource
from mysql.connector.errors import Error
from mysql_connection import get_connection
import mysql.connector

### API 를 만들기 위한 클래스 작성
### class(클래스) 란??  변수와 함수로 구성된 묶음!
### 클래스는 상속이 가능하다!
### API를 만들기 위한 클래스는, flask_restful 라이브러리의
### Resource 클래스를 상속해서 만들어야 한다.

class RecipeListResource(Resource):
    # restful api 의 method 에 해당하는 함수 작성
    def post(self) :
        # api 실행 코드를 여기에 작성

        # 클라이언트에서, body 부분에 작성한 json 을
        # 받아오는 코드
        data = request.get_json()

        # 받아온 데이터를 디비 저장하면 된다.
        try :
            # 데이터 insert
            # 1. DB에 연결
            connection = get_connection()

            # 2. 쿼리문 만들기
            query = '''insert into recipe
                    (name, description, cook_time, directions)
                    values
                    ( %s , %s , %s ,%s);'''

            record = (data['name'], data['description'], data['cook_time'], data['directions']  )

            # 3. 커서를 가져온다.
            cursor = connection.cursor()

            # 4. 쿼리문을 커서를 이용해서 실행한다.
            cursor.execute(query, record)

            # 5. 커넥션을 커밋해줘야 한다 => 디비에 영구적으로 반영하라는 뜻
            connection.commit()

            # 6. 자원 해제
            cursor.close()
            connection.close()

        except mysql.connector.Error as e :
            print(e)
            cursor.close()
            connection.close()
            return {"error" : str(e)}, 503

        return {"result" : "success"}, 200

    def get(self) :
        # 쿼리 스트링으로 오는 데이터는 아래처럼 처리해준다.
        offset = request.args.get('offset')
        limit = request.args.get('limit')

        # 디비로부터 데이터를 받아서, 클라이언트에 보내준다.
        try :
            connection = get_connection()

            query = '''select *
                    from recipe
                    limit '''+offset+''' , '''+limit+''';'''

            # select 문은, dictionary = True 를 해준다.
            cursor = connection.cursor(dictionary = True)

            cursor.execute(query)

            # select 문은, 아래 함수를 이용해서, 데이터를 가져온다.
            result_list = cursor.fetchall()

            print(result_list)

            # 중요! 디비에서 가져온 timestamp 는
            # 파이썬의 datetime 으로 자동 변경된다.
            # 문제는! 이데이터를 json 으로 바로 보낼수 없으므로,
            # 문자열로 바꿔서 다시 저장해서 보낸다.
            i = 0
            for record in result_list :
                result_list[i]['created_at'] = record['created_at'].isoformat()
                result_list[i]['updated_at'] = record['updated_at'].isoformat()
                i = i + 1

            cursor.close()
            connection.close()

        except mysql.connector.Error as e :
            print(e)
            cursor.close()
            connection.close()

            return {"error" : str(e)}, 503


        return { "result" : "success" ,
                "count" : len(result_list) ,
                "result_list" : result_list }, 200
5. VS Code
app.py파일로 돌아와 경로와 resource(API 코드)를 연결한다.
from flask import Flask
from flask_restful import Api

from resources.recipe import RecipeListResource
from resources.recipe_info import RecipeResource


app = Flask(__name__)

api = Api(app)

# 경로와 resource(API 코드)를 연결한다.
api.add_resource(RecipeListResource, '/recipes')


if __name__ == '__main__' :
    app.run()
6. 내가 설정한 가상환경에 접속 후 터미널에 python app.py를 작성해 실행해준다.
python app.py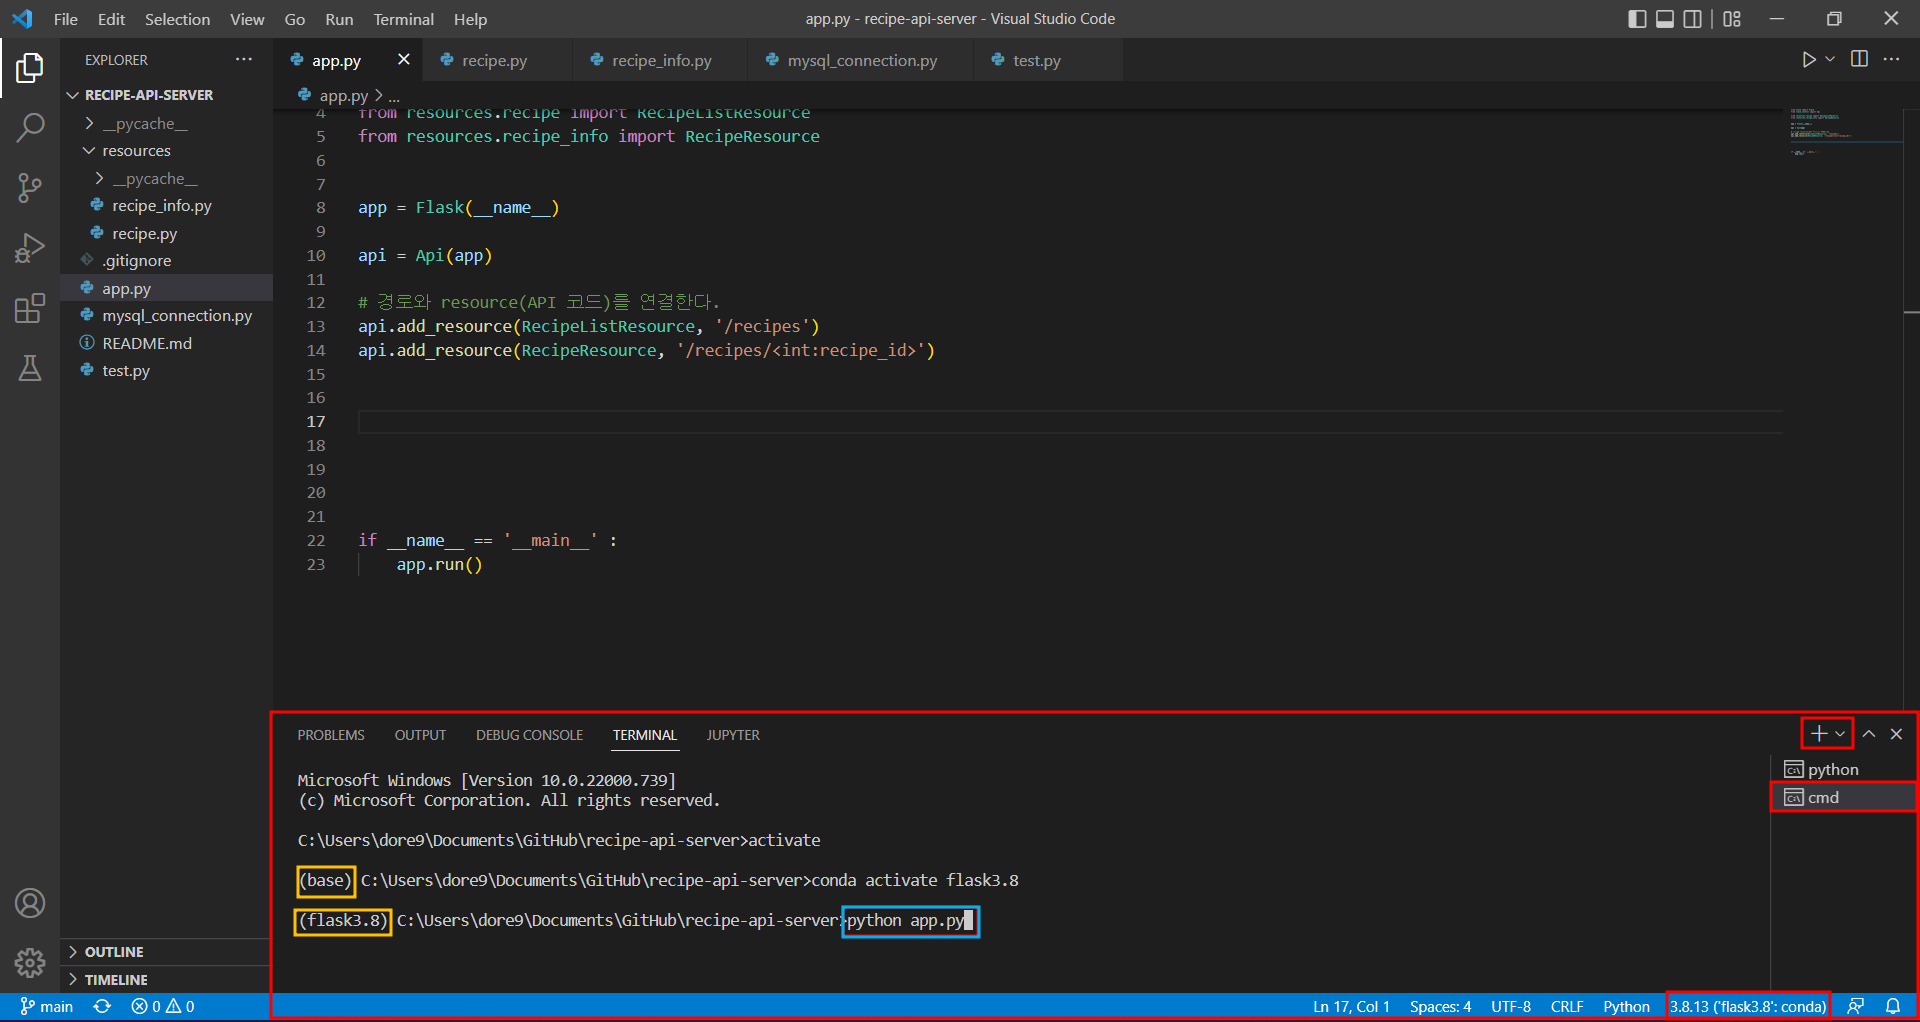
7. POSTMAN 을 실행하고 LOGIN 한다.

8. 스크롤을 조금 내리고
Get started with Postman - Start with something new - Create New를 클릭한다.

9. Collection 을 클릭해 새로운 Collection을 만들어 준다.

10. Collection의 이름을 설정 해준다.

11. 이름을 지정한 Collection에 Add request를 눌러 필요한 request를 추가한다.

12. request 이름을 지정해 준 후 필요한 Method를 선택 후 작업을 진행할 수 있다.

13. POSTMAN에서 실행 후 MySQL을 통해 DB를 확인 할 수 있다.

14. VS Code에서 터미널에 나온 로컬주소를 Ctrl + Click 후
지정한 경로를 기재해주면
로컬페이지에서도 확인이 가능하다.

'BackEnd' 카테고리의 다른 글
| API - 회원가입 / 로그인 API에서, 토큰 생성해서 처리하는 방법 (0) | 2022.06.20 |
|---|---|
| API - Flask에서 JWT 설치방법 (0) | 2022.06.20 |
| API - Python MySQL Connector를 이용해 delete 하는 방법 (0) | 2022.06.19 |
| API - Python MySQL Connector를 이용해 update 하는 방법 (0) | 2022.06.19 |
| API - Python MySQL Connector를 이용해 select 하는 방법 (0) | 2022.06.19 |


